August 28, 2014 | Posted in CRAFTING BUSINESS | By sockii
All About Display Items, Fixtures, and Other Things You Will Need to Get Your Vending Business Started
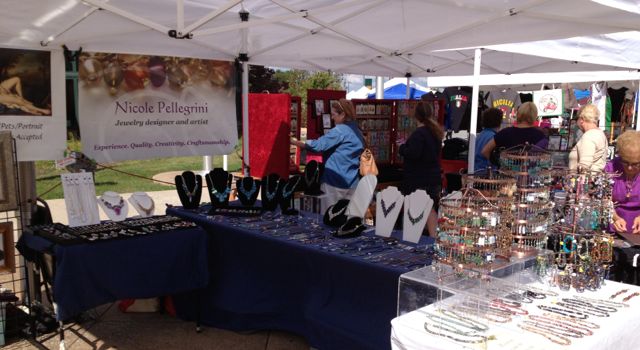
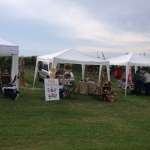
Come under my tent and start shopping! Photo by sockii.
This article is the second in my series on becoming a vendor at craft shows and craft fairs. The first article, “Becoming a Craft Show Vendor Part 1: Is Vending Right For You?” looked at the factors one must consider to determine if becoming a craft vendor is a good idea for you. If you’ve decided that yes, you are interested in giving vending a try, then you are ready to start preparing for shows. To be well prepared, you must know what kind of display fixtures and other materials you will require – besides your craft inventory, of course. This article will examine the basics of what a crafter needs in order to set-up, display and sell at most typical craft fair events.
Looking through this list of fixtures and display items may seem daunting, and pricey. It’s definitely true that one can easily spend over $1,000 getting the materials needed to do a professional-looking craft show set-up. You don’t have to get everything listed here right for your first show, but the more you want to make a good impression on potential customers, the more professionally you want to present your work. Your craft items won’t just sell themselves, and display is very much a part of the art – and business – of being a vendor.
Your mode of transportation is also worth considering before getting too far involved in craft vending. Considering the bulky nature of many of the display items and fixtures you will need – even if collapsible and lightweight – hopefully you own or have access to at least a mini-van or SUV to go from show-to-show. Trying to fit everything you need into a compact car is nearly impossible unless you are only working small indoor craft shows.
1. Portable folding tables and chairs.
Some craft fairs and shows will provide you with a single table and chair for your space, but not all will do so. Additionally, they will likely charge you a “rental fee” if you use their tables instead of your own. As such, having lightweight, collapsable tables and chairs of your own are a must. Even if you are selling artwork that you will be hanging mostly on wall displays, you should still plan on having a table or two in your booth for doing sales paperwork, packaging items, putting out business cards or displaying a guestbook customers can sign to get on your mailing list.
Keep in mind that a standard craft fair space for outdoor and larger indoor shows is 10 foot by 10 foot. Some small indoor shows may only give you space for a single 6′ or 8′ table. So get folding tables that will maximize use of the space that you get: I personally use two smaller 3’x 4′ tables, and two larger 2.5’x 5′ tables.
You should also consider, besides tables, if your display could benefit from bookshelves, curio cases, wire racks or other items which will help “vertically” build your space. Having items at “eye-level” for customers helps draw their attention as they pass by. Make sure these are lightweight items that you can fold and easily transport with you, show to show.
CHECK PRICEColeman Pack-Away Folding Table
A lightweight, folding table such as this one is perfect for craft fairs. It won’t take up too much room in your car, and is easy to carry to and from your set-up space. Don’t count on shows supplying your display tables for you!
2. Table cloths, drapes, and professional table covers.
An uncovered table looks unattractive – and is sometimes even banned by strict craft fairs. You can start out using just simple, inexpensive tablecloths (stick with solid colors – patterns will likely distract from your craft work), but make sure to pin loose or long edges back neatly so they aren’t blowing around, or causing a potential trip-and-fall hazard to customers. Some on-line companies sell professional table covers, runners and skirts that can even be imprinted with your own logo and name, such as 4imprint and Premiere Table Linens, but these can get expensive. Still it’s worth keeping an eye out for good deals on such items, on Ebay or similar sites. If you start getting serious about doing a lot of shows, professional quality table covers will make your display look that much more appealing.
You can also add splashes of color and interest to your display with the use of some accent cloths, scarves, or table runners. Just be sure that while they draw the eye, they don’t end up clashing with or obscuring focus from your crafts. Small jewelry pieces can get lost on busy fabrics, and instead generally stand out best on simple black or white displays.
3. A tent for outdoor events.
A portable tent is a must if you start doing outdoor craft events. Many events are “rain or shine,” so you don’t want to be stuck out in a rainstorm unprotected. Some shows will not even let you display if you do not have a tent to protect your work and present a uniform look to the public.
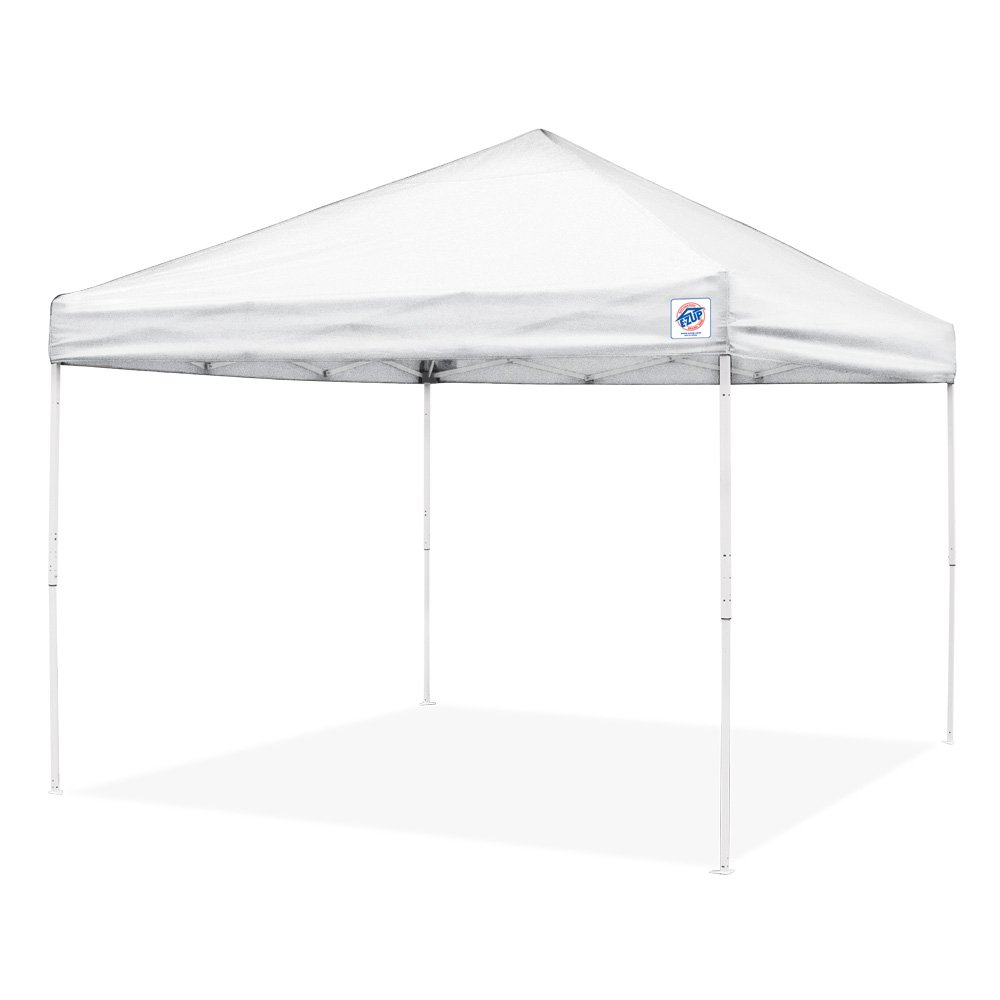
E-Z Up is the standard tent used by most vendors, as their tents are relatively easy to set up and come in standard sizes for craft show spaces. A simple, basic tent may do you well to start, but you will likely find with time you also will need side panels for wind and rain protection, stakes for securing the tent on grassy ground, and weights for keeping the tent stable during heavy winds. I would recommend foregoing custom printing and colors for your tent, as some craft shows again have stipulations that all tents must be uniform in appearance, including being a basic white in color. Again, you may be able to pick up a used tent for cheap on Ebay or Craigslist, so spend some time shopping around before buying new or at full retail price.
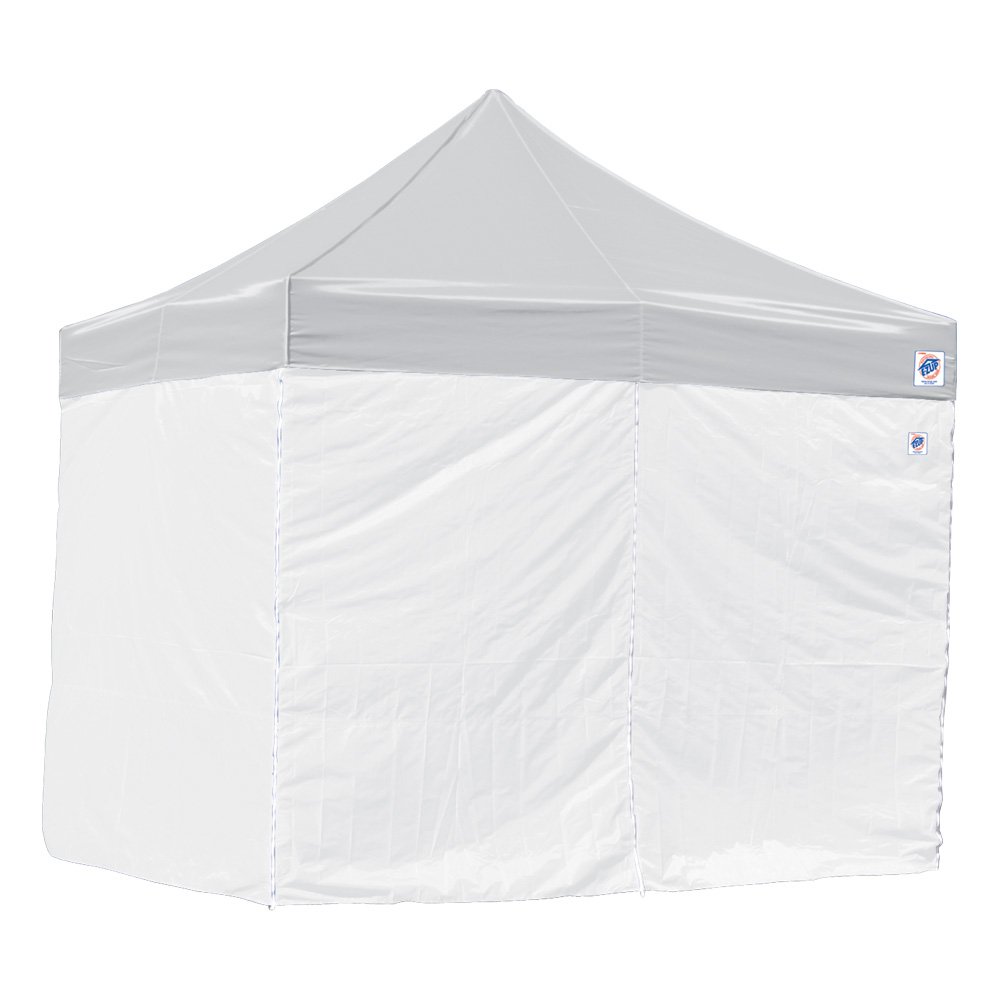
Besides the basic tent, there are two accessories you’ll definitely need. One is some kind of weighting system for the tent legs, such as the weight bags sold by E-Z Up (just fill them with sand and strap them to the legs.) Trust me, windy outdoor shows can be dangerous, not just to your crafts but to shoppers if your tent is ready to blow over! You should also invest in some cloth sidewalls, both for shelter and weather protection, and if you need to close up your tent and leave it in place overnight.
E-Z UP 10 by 10 PyramidCHECK PRICE
E-Z Up Instant Shelters Deluxe Weight Bags – Set of 4CHECK PRICE

E-Z UP 10-Feet Dura Lon Sidewall Set of 4, WhiteCHECK PRICE
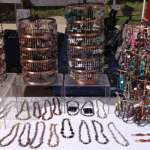
4. Merchandise displays and fixtures.

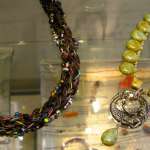
While in Italy I found this unique wooden display, which works perfectly for displaying small jewelry items.
So, you’ve got your basic tent, tables and covers. What comes next will depend on the type of craft merchandise you are making and selling. You need an attractive way to display the merchandise, without overcrowding it or making it look too sparse. A good idea at this point (or earlier) is to go to some craft shows and take notes on display set-ups you find attractive, especially for merchandise similar to your own. If you are selling artwork or hanging items, you may need to purchase some gridwall for portable hanging and display. For clothing, you’ll need garment racks, and possibly a mannequin or two. There are multitudinous ways to display jewelry from acrylic and metal stands to velvet trays and leather headstands, so try to come up with a uniform look that works for your items. If you sell small, very expensive pieces you should consider buying some lockable, glass or acrylic display boxes or perhaps even a larger standing showcase.
If you live in a large city, you might be able to find a fixture display store near you to purchase such items. Otherwise there are many vendors on-line from which display fixtures and materials can be purchased, such as Fixture Depot and Allen Display. Fire Mountain Gems sells many jewelry display fixtures along with their beading supplies. You might also choose to put your creativity to use in designing and building your own displays. Jewelry headstands can be made from foamcore or cardboard covered in felt or velvet. A child’s bookcase could be a nice display for handmade wooden toys. A holiday cookie tin could make a cheery holder for Christmas crafts – or why not bring a small artificial tree to hang those handmade ornaments on for sale? Originality can make your booth more eye-catching and help showcase your artistic skills.
Pinterest is a great place to look for inspiration for creative craft displays, too.
5. Packaging materials.
Once you’ve sold some of your craft items, you need a way to package them for your customers to take home. Customers often appreciate nice packaging, especially if they are buying an item as a gift. You’ll want some small gift boxes or bags for jewelry items, and some bigger boxes and bags for larger merchandise. Bubblewrap and tissue paper are good ideas for packaging fragile items. Uline is a great source for these materials, and you can even order retail bags and tags from them customized with your name and logo – a great marketing tool so people remember who they purchased an item from.
6. Portable lighting.
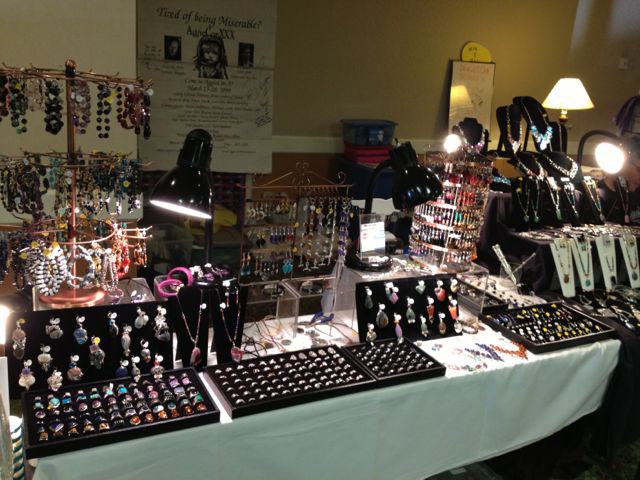
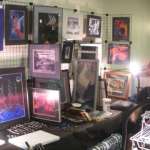
Let there be light! Indoor events can be very dark without them. Photo by sockii.
Lighting is a must for jewelry crafters, although not always available or an option at outdoor shows. I also recommend bringing your own lamps and lights in general as you may end up working shows in poorly-lit hotel banquet halls, church basements, school gymnasiums, convention halls, or other facilities with very poor overhead lighting. If your work can’t be seen and appreciated properly, it’s going to be harder to sell it. Practice will teach you just how much and what type of lighting is best for your merchandise. Avoid fluorescent and halogen bulb lamps and stick with “natural light” lightbulbs, typically 60 Watt strength. Also, don’t forget to bring a heavy duty extension cord, one or more power strips, and duct tape or other covering material so that your cords do not become a trip hazard.
Some shows will charge you extra for needing electricity for your booth – anywhere from $25 to $125, depending on the venue. But don’t be cheap, thinking you won’t need it. Spending the extra money for electrical access can easily pay for itself in higher volume sales.
CHECK PRICEJansjo Desk Work LED Lamp Light, Black
Think elegant – and small footprint – when choosing lighting options for your booth or table. You want something where you can focus light specifically on certain objects, look artistic, and won’t take up too much space on your table. There are lots of different options out there, like this LED lamp.
7. Business cards, brochures and flyers.
Finally, make sure you have promotional materials such as flyers, business cards, and brochures to hand out to customers. A buyer who likes one item may want to get in touch with you later on to purchase more. Or someone who didn’t have the money to buy an item at one show may wish to get in touch later on to purchase something. The more professional-looking your promotional materials, the better as well. If you don’t have a good high-quality color printer at home or aren’t great with graphic design, consider using a professional printing service such as VistaPrint. They have numerous templates to start from, which you can add photos and your information to and get great looking promotional materials quickly. You can also order large, custom-printed banners from them to hang in your booth or off the front of your table.
There are of course many other small things you will find you need to keep on hand as you work shows: a money belt or cash box; sales receipt booklets; tape, pens and tools. But the major items are what I’ve tried to cover in this article and hopefully have given you some sense of how to plan for setting up for craft shows.
In the next article in this series, I will look at finding and applying for craft fairs and shows: things to look for, as well as things to avoid.
Related posts at Spacial Anomaly
Share this:

Table of Contents
- All About Display Items, Fixtures, and Other Things You Will Need to Get Your Vending Business Started
- 1. Portable folding tables and chairs.
- 2. Table cloths, drapes, and professional table covers.
- 3. A tent for outdoor events.
- 4. Merchandise displays and fixtures.
- 5. Packaging materials.
- 6. Portable lighting.
- 7. Business cards, brochures and flyers.
sockii
sockii is just your typical Jane-of-All-Trades who never has enough time in her day for all of her projects. She has written for many websites online including Squidoo, Zujava, Yahoo! Contributors Network, HubPages and Wizzley. She has been attending and vending at science fiction and media conventions for over 15 years, and for several years ran an art gallery and jewelry store in Philadelphia. Today she is happy to be living in South Jersey with her partner David and their 6 cats. Sockii is a member of several affiliate sales programs including Amazon Associates and Viglink. Products from these services may be advertised on her posts and pages to generate sales commissions.
5 Comments
- Becoming a Craft Show Vendor, Part 3: Finding Craft Events in Your Area - […] two articles focused on determining if becoming a craft vendor is a good choice for you and then the…
- Becoming a Craft Show Vendor, Part 4: How to Set Your Prices - […] sell. Previous articles have examined (1) determining if being a craft vendor is right for you, (2) designing your…
- Becoming a Craft Show Vendor, Part 5: Do's and Don'ts when Dealing with Customers - […] you’ll need to know before actually working your first show: the basics of being a vendor, choosing and setting…
Leave a Reply
*


sandy
August 28, 2014
This is really interesting. Thank you for the detailed information. I know some arts people who will be interested in this.
sockii
August 29, 2014
Thanks, sandy! I originally published this series at Yahoo but I’m trying to update it with some more current information, based on changes to the business over the past few years.